This post may contain affiliate links which means I may receive a commission for purchases made through links. I will only recommend products that I love! Learn more on my Private Policy page.
Round label design is one of my favorite DIY projects for parties, events, and even small business packaging.
I love how simple and creative this process can be, especially when I use Canva and Avery tools together.
Today, I’m sharing how I make round stickers, test them, and get the perfect print every time.
This post covers everything you need to know about creating a custom label design.
Why Round Labels Are So Useful
I love how versatile round labels are. I’ve used them on charcuterie cups, gift bags, and even homemade jars, and they always make things look so put together.
The round shape feels clean, modern, and just a little bit fun.
I also like playing around with custom labels because they instantly make any project look more professional.
Even adding a few personalized stickers can turn the smallest detail into something really special.

Supplies I Used
-
Canva account (free or pro)
-
Avery website for printing
-
Printer and sticker paper sheets
-
A design idea you want to test
Having these basics ready makes the whole label sticker design process smooth and easy.

Canva Instructions for the Label
1 | Start a New Design
-
-
Open Canva and create a custom size 2×2 inch canvas.
-
Add your background, graphics, and text inside the square.
-
Save this version as a PNG (not transparent). You’ll use this file in the next step.
-
2 | Prepare the Round Template
-
Duplicate your square design.
-
On the duplicate, add a circle outline for guidance.
-
Insert a circle frame from Canva Elements. This frame makes your design perfectly round.
3 | Place Your Design Inside the Circle
-
-
Upload the PNG you saved in Step 1.
-
Drag it into the circle frame. Canva will snap it into a perfect round shape.
-
Adjust the size or placement if needed so it looks centered.
-
3 | Save the Final Round Label
-
Download this version as a PNG with a transparent background.
-
This is the file you’ll upload to the Avery website when using their round label template.
Why it works:
-
Saving the first square PNG keeps your design intact.
-
Dropping it into the circle frame ensures it fits the round format perfectly.
-
Saving the final version as transparent guarantees Avery prints only your label design, not a square background.

Want the exact labels I used? Sign up below to grab your free template!
Upload to Avery Templates
Next, I go to the Avery website. On the homepage, I click “Find a Template.” Then, I search for round labels and select the 2×2 size.
I always pick the blank template option. That way, I can upload my own Canva design.
Avery lets me preview exactly how my custom stickers will look on the sheet.
Download and Print
Once the design is placed, I click “Preview and Print.” Avery generates a PDF file ready for printing.
Here’s where I give you my biggest tip. Always print the template in grayscale on plain paper first.
This test helps me check the alignment before wasting sticker sheets.
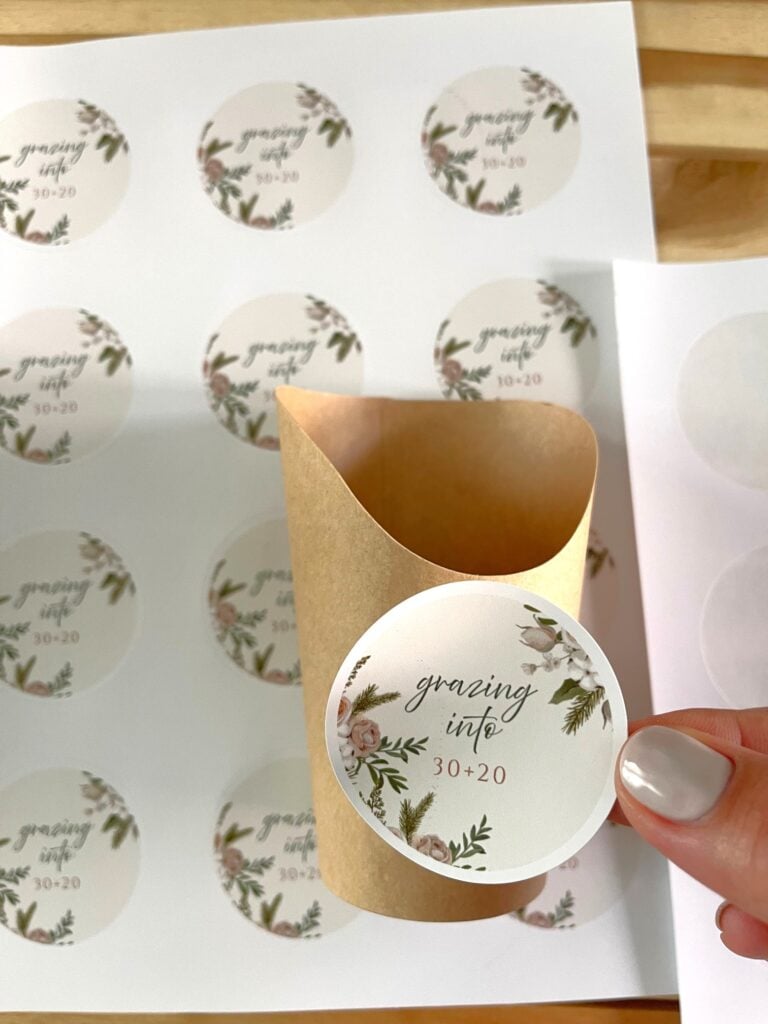
When I’m ready to print the final sheet, I only feed one sticker sheet at a time into the printer.
Doing it this way keeps the paper from shifting and gives me perfect alignment every time.
Tips for Perfect Round Sticker Printing
I’ve learned a few tricks along the way:
-
Always test with normal paper before sticker paper.
-
Use grayscale first to avoid wasting ink.
-
Insert one label templates design at a time for clean results.
-
Let the ink dry before peeling.
These little steps make the whole process stress-free.

If you’re curious to see where I first used these round labels, you’ll love my individual charcuterie cups.
They turned out so cute and way easier than I expected.
Come take a peek at how I pulled it off in How I Perfected Individual Charcuterie Cups on My First Try.
Creative Ways to Use Round Labels
Round labels are so versatile, and once I started making them, I realized just how many uses they have.
For Parties and Events
I love using round stickers on party favors, drink cups, and even treat bags.
They instantly make everything feel coordinated and polished.
For Food and Entertaining
Round labels look so cute on charcuterie cups, mason jars, or baked goods packaging.
They’re perfect for labeling homemade jams, cookies, or spice jars.
For Business and Branding
Small businesses can really benefit from custom labels.
Adding a logo or tagline to packaging with personalized stickers makes products look professional without a big cost.
For Organizing at Home
I’ve used round labels for pantry jars, toy bins, and even craft supplies.
They’re easy to spot and give everything a neat, uniform look.
For Gifting
Instead of a traditional card, I sometimes print custom stickers with a message like “Thank You” or “Happy Birthday.” It’s such a fun way to personalize gifts.

Wrapping It Up
Making round label design projects at home is fun, budget-friendly, and creative. With Canva and Avery tools, the process feels effortless.
Whether you want personalized stickers for gifts or custom labels for a small shop, this method works every time.
I hope my little tips about alignment, grayscale testing, and label sticker design help you create perfect labels too.